Fall tillage tips
DEMONSTRATION PLOTS FROM LAST YEAR PROVIDE INSIGHT INTO THIS YEAR’S FALL TILLAGE OPTIONS
with so many tillage options out there, it can be challenging to sort through the data and find a system that works best on your farm. As fall tillage is underway and winter wheat and canola are about to go into the ground, here are some lessons learned from previous seasons.

Demonstration plots showed different tillage management techniques and were highlighted by the Ontario Canola Growers and the Georgian Central Soil and Crop Improvement Association at a field day in September of 2010. Canola and wheat growers watched a variety of residue management equipment and drills operate in heavy canola residue (4,000 pounds per acre). Here are some things that were learned that can be applied on the farm.
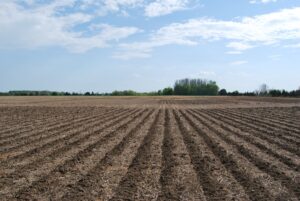
PHOTO 1: FARMERS INSPECT THE IMPACT OF TILLAGE AND PLANTING METHODS ON WHEAT PLANTS
uniform spread
“Residue management starts at the combine,” says Peter Johnson, Ontario Ministry of Agriculture, Food and Rural Affairs Cereals Specialist. “During the demo, all vertical tillage units struggled in the areas where the chaff row existed. This is proof that it’s essential to do a good job of spreading trash. Chaff spreaders are mandatory, not optional,” he continues. After a heavy canola crop, this spread is especially important. “Chaff spreaders are a must in heavy canola crops and most other crops as well,” says Johnson.
proper depth
The demonstration also revealed a common problem surrounding planting depth. “Nearly every drill was set too shallow,” says Johnson of the demonstration. “It’s impossible to expect a drill to cut through trash and place the seed well at 1/4 inch deep. And planting depth should be targeted not less than one inch” says Johnson.
When determining depth it’s also important to consider the moisture of the soil. “In no-till, the soil must act like a ledger plate to allow the disc to slice through the residue, rather than hairpin it into the slot and put the seed on top of it,” explains Johnson. “Under wet conditions, the soil doesn’t always behave and sometimes it’s necessary to deepen planting another 1/2 inch to accommodate this.”
showy, snowy wheat
“At freeze-up, wheat that had the most tillage done ahead of planting looked the showiest, while the poorest looking wheat was where it was no-tilled into heavy residue,” says Johnson. “Aggressive tillage buries all the residue, making the soil more black which attracts more heat, giving more growth,” says Johnson of the “showy” wheat.
But, he cautions, looks aren’t everything. “Heavy tillage increases the risk of erosion and it puts wheat at a higher risk for snow mould,” says Johnson. In years of heavy snowfall, residue can help protect the wheat against the development of snow mould. “There is something about crop residue that acts as a fungicide against snow mould spread. We don’t fully understand it, but the trials and the plots don’t lie,” says Johnson.
beyond tillage
One of the biggest lessons learned was observed after the demonstration in the fall when the wheat came out of the ground. Brian Wiley, the farmer who hosted the event observed some interesting effects on the demonstration sight that show that tillage isn’t always the be all and end all.
“After the original demonstration day I returned three weeks later to plant areas which had been missed. It has became quite apparent that no matter what tillage tool was used – no till, vertical or conventional till – the areas that had a three week advantage were further established before winter and well on their way to higher yields,” says Wiley.
Johnson confirms this anecdotal finding and emphasizes that regardless of what type of tillage you use wheat benefits from early planting. •